Showing posts with label Finger Food. Show all posts

Monday 8 November 2010

CP Thai Shrimp Cake

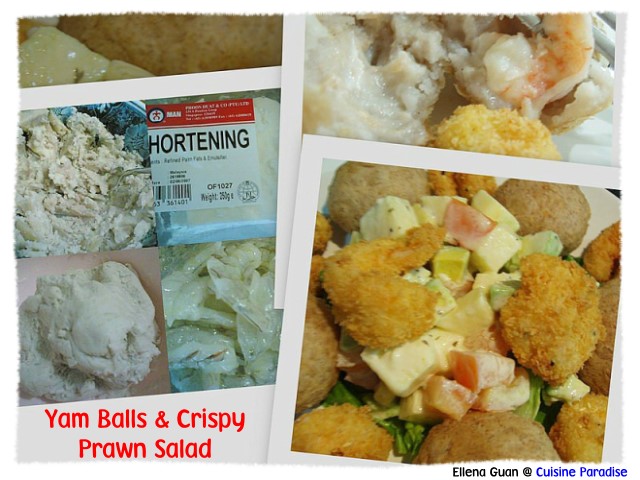
Recently I got a pack of CP Thai Shrimp Cake (泰式虾饼) which I was wondering what I could do with it. And with my busy schedules I would prefer something quick and easy rather than sweating in the kitchen. So here are some quick ways on how I have make use of these delicious shrimp cake to whip up simple dishes to satisfy our hungry appetite in the shortest time.

First let's look at these yummy snacks; you don't even need more than 10 minutes to prepare them before you could enjoy these soft and fragrant Thai shrimp cake bun anytime of the day even on weekday breakfast. All you need is to get the necessary ingredients ready on the night before so that you could save some time on waking up earlier to prepare the ingredients.

For those who are tired of having the usual coffee and bread for breakfast, why not give this a try and you can even add in some lettuce and tomato to make it healthier too.

Ingredients: (makes 4 buns)
4 Plain Leaf Bun
8 -12 Pieces of CP Thai Shrimp Cake
1 Medium Tomato, thinly slices
Some Lettuce Leaves

Method:
1. Steam the leaf bun together with shrimp cakes on the same plate for about 5 minutes, remove from heat and set side.
2. To assemble them, slowly peel open the leaf bun, place some lettuce leave and a slice of tomato then sandwich it with 2 - 3 pieces of shrimp cakes.
3. You can also drizzle some chilli sauce (recipe shown below) over it and serve immediately.


Drizzling Sauce: (optional)
1 1/2 Tablespoon Thai Sweet Chilli Sauce
1 Teaspoon Hot Water
1 Shallot, thinly slices
1 Small Chili, remove seeds & chopped

Method:
1. Mixed all the above ingredients together and served as dipping sauce or drizzle on the fillings.

Note:
~ Drizzling Sauce can be prepared overnight.


Want some quick and easy finger food within 3 minutes to pair with your fried rice, bee hoon or instant noodles? Or you are looking for some authentic party food to impress your guests. No matter what is your intention, I am sure these mini CP Thai Shrimp Cakes would always come in handy for all occasions.

All you need to do is just toast them in oven toaster for 5 - 8 minutes or for a faster alternative, microwave them for 2 - 3 minutes on medum high depending on your microwave power(watt).


Or if you are looking for something more filling for lunch or dinner maybe you can consider using these shrimp cake to whip out some fried rice together with egg and vegetable. I can be assured that you would be surprised on how tasty these shrimp cake can tranform the plain rice into an "Egg-wrapped Fried Rice" dish in less than 30 minutes.

Don't worry if you cannot make a nice egg sheet to wrap the rice, you could always mix and match the ingredients to suit your preference and time limit. If egg wrap don’t work well for you, try adding it into the rice itself to make normal fried rice with egg. Here are some ingredients and steps for my “Egg-wrapped Fried Rice” dish: -

Ingredients: (serve 1 - 2)
1 Rice Bowl of Cooked Rice
5 pieces of CP Thai Shrimp Cake
2 Medium Egg, lightly whisk
1 Tablespoon of Green Bean/Mixed Vegetables
2 Cloves Garlic, finely minced
Dash of Thai Fish Sauce/Light Sauce Sauce


Method:
1. Cut the shrimp cakes into small portions (about 6 rectangles per piece), set aside.
2. Pre-heat the frying pan with 1/2 Tablespoon of oil, slowly pour in the egg mixture and give it a swirl around the pan so that the egg mixture is evenly spread out.
3. Fry the egg sheet on low heat till slightly brown, slowly loosen the side of the egg sheet and flip it over with a spatula and cook the other side till done.
4. Remove and set it over a small rice bowl while preparing the fried rice.
5. Add in another 1/2 tablespoon of oil add in the shrimp cakes pieces and give it a quick stir for about 30 seconds, dish up.
6. Next sauté the minced garlic for a few second then drop in the green bean and continue to fry for another 30 second or till the garlic turned slightly brown.
7. Pour in the cooked rice, increase the heat to medium then use a spatula to loosen the rice so that it would be grainy instead of lumpy.
8. When the rice is almost done, add in the shrimp cake and dash of fish sauce to season the rice.
9. Remove from heat and spoon the rice evenly into the egg sheet bowl, fill the fried rice to the rim of the bowl and tuck in the sides of the egg sheet to form a bowl.
10. Over turn the egg wrapped bowl onto serving plate, decorate it with some garnish and served immediately.

Note:
~ You can cooked the rice the night before or early in the morning if you are preparing this for lunch or dinner.

For a quick snack or lunch meal for kids, perhaps you can add in some shredded mozzarella cheese to do a cheesy bake rice for them. I am sure they would finished the bowl of rice without fuss and ask for second helping too.

To prepare this dish, you could use the same fried rice shown above by increasing the quantity and dish up some portion to bake it with cheese for your kids. Or you can always served two different flavour of this dish so that each one of the family members could get a chance to taste both of these dishes.

Ingredients:
Some Shrimp Cake Fried Rice
Decent amount of Shredded Mozzarella Cheese
Dash of Ground Pepper


Method:
1. Place a layer of shrimp cake fried rice in the baking dish and topped it evenly with some mozzarella cheese.
2. Next place the 2nd layer of fried rice on top and continue with some generous amount of cheese again.
3. Put the baking dish into oven toaster and bake for about 5 minutes till the cheese is bubbling and the colour turns golden brown.
4. Removed from oven, served hot with dash of ground pepper.


As you have notice from the packaging it shows that these CP Thai Shrimp Cake are well seasoned with Thai Chilli paste and it is made with 70% shrimp which are raised at CP's eco-friendly farms in Thailand. And most importantly this product contains 0g Trans Fat and has no preservatives used. Overall I love its slightly spicy and refreshing taste especially the "Kaffir Lime Leaf" that is infused in these shrimp cake. This special lime fragrant makes makes it very appetising on each bites. And for your informatin, you can easily find these shrimp cake at the frozen food department of any local supermarkets.
Price: S$4.95 each packet (260g)

Lastly I would like to thanks Melvin of Vibes Communications Pte Ltd and CP (Charoen Pokphand) Food for the invitation to try out some of their products. And I would also like to share with you some other quick and easy dishes from those CP Food that I received in some upcoming posts too.


CP Food also provides a special recipes booklet by Chef Forest Leong to share her tips on how to use CP Products to whip up some delicious dishes for celebratory occasion. You can get this booklet at these selected community centers for FREE on a first-come-first-serve basis:-

1. Cairnhill CC
2. Buona Vista CC
3. Bukit Panjang CC
4. Pasir Ris Elias CC
5. Toa Payoh West CC
6. The Frontier CC
7. Kampong Chai Chee


Thursday 13 May 2010

Teochew Ngoh Hiang

In the past, making "Ngoh Hiang - 五香" is always one of my Dad specialty dish. During festive occasion such as Chinese New Year he and mum would make a huge quantity to distribute to our relatives or served it to those who visit us during New Year. But now when he is no long around, we don’t really get to eat this special treat as often as we do.

Saturday 6 February 2010

Deep-Fried Arrowhead Chips

Usually about a month or so before the Chinese New Year, you will be able to catch a glimpse of these "Arrowhead(cigu) - 钱菇" at most of the vegetable vendors in the wet market. This bulb-like corms of the arrowhead is sold roughly about S$3.00 per kg depending on individual stalls.

Thursday 26 November 2009

Baked Prawn With Lemon & Cheese

These baked Lemon & Cheese Prawns are from the Fresh Live Prawn that we caught during our Prawning Trip last weekend at Bottle Tree Park. It is indeed an enjoyable experience on the prawning trip and most of thrilling part is I get to use these prawns for my new dish.

This is a very simple dish that most of you will be able to grab the ingredients right from your fridge at any moment. All you need are some butter, 1 lemon, 2 slices of sandwich cheese if you are run out of shredded cheese. Don't worry if you don't have Fresh live prawn, you can always get any type of prawns from the supermarket or you can even replace it with fish fillet like salmon or any white fish.

Ingredients: (serves 2)
8 Medium Size Prawn
2 Slices of Sandwich Cheese, cut into thin strips
1 Lemon, cut into thin slices
10g of Butter
2 Tablespoon of RUM or Brandy, optional

Method:
1. Wash, trim and slit the back of the prawn into half, becareful not to cut too deep or else the prawn will break into halves.
2. Cut the butter into small cubes and stuff it into cuts of the prawn.
3. Arrange some lemon slices in a baking dish (or you can use disposal foil baking tray), place the stuffs prawn on top of the lemon.
4. Top the shredded cheese on top of the prawns, drizzle the liquor evenly on top of the prawn.
5. If you want that extra citric fragrance on the baked prawn, you can top with some extra strips of lemon rind.
6. Bake in the toaster oven for about 10 - 15 minutes or until the prawn is cook through.
6. You can serve this dish directly from the baking tray or you can re-arrange them in serving plate and serve as finger food for party.


Note:
~ Above is the sample photo of the toaster oven which you might have it in kitchen, it is usually used to reheat bread, pizza or small items.

The gravy of this dish is so fragrance and sweet due to the sweetness that comes from the fresh prawn. Look at the prawns, some of it still comes with prawn roes. The combination of Lemon, Cheese, Prawn and Liquor will definitely stimulate your tastebuds to another level of food tasting. Posted by Picasa


Thursday 21 May 2009

Scramble Egg With Tomato

Are you one of those tomato lover who eats any kind of tomato that is on the shelf of the supermarket? Or you will just pick your choice of those that you love like cherry tomatoes or vineyard tomatoes or ?

Tomato fruit is classified as a berry. As a true fruit, it develops from the ovary of the plant after fertilization, its flesh comprising the pericarp walls. Tomato is also an excellent source of Vitamin C and a good source of Vitamin A. So if you are trying to get one of your kids or love one to incorporate some tomato into their dish. You can try one of this Scramble Egg With Tomato serve in tomato cup as party food breakfast side dish.Posted by Picasa

Ingredients: (serve 2)
2 Medium Size Red Tomato
1 Medium Egg, lightly beaten
1 Tablespoon Milk/Water
1/2 Tablespoon of Chopped Tomato
1 Tablespoon of Chopped Spring Onion
1/2 Tablespoon of Thai Sweet Chili Sauce

Method:
1. Cut the tomatoes, horizontal into halve and carefully scoop out the seeds in it. Pat the inside dry with kitchen paper towel and set them aside.
2. Take 1 of the tomato cup and chopped them into cubes.
3. Whisk the egg with either water or milk until well combined.
4. Drizzle some Olive oil onto a small preheat non-stick pan and add in the chopped tomatoes, give it a few stir until fragrant then scatter in the chopped spring onion.
5. Next pour in the egg mixture and cook the scramble egg accordingly, using a spoon to stir the mixture occasionally.
6. Lastly stir in the Thai chili sauce mixture and give it a quick stir until it combined, fill the egg mixture into the prepared tomato cups and serve as together with some cut fruits as side dish.

Note:
a) You can replace the Thai Sweet Chili Sauce with Tomato Sauce for kid's version.
b) You can also scatter some extra shredded cheese onto the egg tomato cups and put it into the toaster oven of about 3 minutes or so until the cheese started to melt.

Tuesday 12 May 2009

Avocado ~ Egg ~ Tomato

This is my combination of appetiser meal, Avocado Vs Egg Vs Tomato. I simply just love the taste of Avocado, when this is in season I'll always have it in my fruit basket. I love to eat it with plain yogurt, or blend it with some fresh milk and honey and serve it as a health afternoon snack or after meal refreshment with a few ice cubes.

There are so many ways and ideas that you can eat your avocado with. And also high avocado intake has been shown to have an effect on blood serum cholesterol levels and it is also rich in B vitamins, as well as vitamin E.

In this appetiser, I used 1 avocado, 1 hard boiled egg and 2 ripe medium size tomato to come out with 3 different taste and texture of the combination.

Mashed Avocado & Egg Salad
~ Mashed half of the hard-boiled egg with about 2 to 3 slices of avocado and serve it in a tomato cup.

Avocado Slices With Plain Yogurt
~ Arrange some avocado slices on plate and top with a dollar of plain Greek yogurt(or you can choose yogurt of your favour).

This is great to serve as a an presentable appetiser when you have guest around the house. You can top with with other fresh fruits of your choice or you can use tomato or cucumber or any combination that you prefer.Posted by Picasa

~ Cut the avocado into half, carefully scoop out the fruit and leave the shell in shape.
~ Place half of the hard-boiled egg in the middle and filled the space of the shelf with avocado & tomato cubes.
~ Drizzle with some BBQ or Thai Chilli sauce before serving.


Sunday 14 September 2008

Steam Corn Kernels Dumplings

I believed most of us will fancy on Sweet Corn which is sweet and full of favour. You can either steam it and eat with a touch of butter or you can use it for making desserts or even salad. Corn contains beta-carotene, small amounts of B vitamins and vitamin C. It is a useful source of protein and is rich in fiber.


This afternoon, we will be having this cute and nutritious finger food to serve together with rice. I made these using Pork and Prawn minces with shredded carrot, water chestnuts and some seasonings. From the usual dumpling skin which used to wrap the filling and steam as we called it Shao Mai (click link to read more) or Siew Mai in more of the Chinese dim sum restaurants. I replace the dumpling skin with corn kernels which will give it a new look and also increase the texture and favour of this dish.

I am sure most of the kids will love this dish because of the corn kernels and it's colourful appearance. This is also another good method to put vegetables and meat together for kids to consume.Posted by Picasa

Ingredients: (make about 10 dumplings, ping pong ball size)
150g Pork Mince
150g Prawn Mince
20g Shredded Carrot
3 Water Chestnuts, finely chopped
1 Tablespoons of Chopped Spring Onion
1 Teaspoons of Grated Ginger
1/2 Tablespoons of Shallot Slices
Seasonings:
1 Tablespoon of Light Soy Sauce
1/2 Tablespoon of Sesame Oil
1/2 Tablespoon of Cooking Wine
1 Teaspoon of Cornflour
1/2 Teaspoon of Pepper
Coating:
1 cup of corn kernels, either frozen or fresh

Methods:
1. Mixed all the ingredients(except the corn kernels) and seasonings together till well combine and set aside in the fridge to marinate for at least 1 hours or overnight.
2. Put the corn kernels on a flat plate, roll about 1 tablespoon for filling into a round shape then coat with the corn kernels. (You might need to use your finger to stick the corn kernels to the filling.)
3. Set aside on a steam plate and continue with the rest of the rolling and sticking.
4. Steam the corn dumplings on medium heat heat for about 7 - 10 minutes depending on the size.
5. Slowly remove it from the steaming plate and arrange them on the serving plate and prepare the drizzling egg sauce.
6. To prepare the egg sauce, preheat a small frying pan or sausage with some oil, add 1 teaspoon of oyster sauce and let it bubble for a few second then add in 60ml of water, and stir till the oyster sauce is mixed through.
7. Next, slowly add in one tablespoon of beaten egg white and stir until it change colour then add in some cornstarch water to thicken the sauce.
8. Use a spoon to drizzle the sauce on top of each arranged corn dumplings, top with extra chopped spring onions and chillie and serve.

Tips:
a) You can replace the chopped chillies to Chopped Carrot for the topping if this is to serve for kids.
b) To make the prawn mince, you can either chopped the shelled prawn using the back of the knife or you can put it in the food process and blend it together with the pork mince and seasonings.
c) To make an easy egg sauce, you can used ready stock pack and just pour the chicken stock into a small saucepan and then before it begin to boil, stir in the egg white and thicken with corn starch.

Tuesday 8 July 2008

Roast Chicken With Lemon & Rosemary

Rosemary is a woody, perennial herb with fragrant evergreen needle-like leaves. It is native to the Mediterranean region and the name derive from the Latin name rosmarinus, which literally means "dew of the sea". The fresh and dried leaves are used frequently in traditional Mediterranean cuisine as an herb; they have a bitter, astringent taste, which complements a wide variety of foods. It is is extremely high in iron, calcium, and Vitamin B6.


For today's quick and easy meal, I will like to share with you one of our favour way to roast chicken wings. It's pretty easy to prepare and bursting with juicy taste and scented with the aroma of the herbs.Posted by Picasa

Ingredients: (serves 2)
4 - 6 Chicken Wings, washed and tuck-in
3 - 4 Cloves of Garlic, thinly sliced
6 Slices of Lemon
1 Spig of Rosemary
1/2 Tablespoon of Lemon Juice
Pinch Of Salt
Ground White/Black Pepper
5 - 10g of Butter, optional

Methods:
1. Washed and pat dry the chicken wings then tuck in the wings.
2. Marinate the Chicken Wing with garlic, lemon, rosemary(the leave only), salt and pepper for at least 1 hour or leave it over night in the fridge.
3. Preheat the oven to about 180 degree, place the marinated chicken wings in the baking dish and top each wings with the lemon and garlic slices from the marinate and a little cubes of butter(optional) and bake for about 20 - 30 minutes(depend on the oven) until golden brown and cooked through. (turn the wings once or twice to have even baking colour)
4. Served with baked potato, fries, spaghetti or as finger food.

OR (in order to cut down the baking time)
3. Place the marinated chicken wings in a microwave oven and cooked on medium heat for about 5 - 8 minutes.
4. Remove from the microwave and place it in baking dish and top with a tiny dot of butter and arrange the lemon and garlic slices on top of the chicken wings.
5. Bake in an oven toaster for about 15-20 minutes turning the wings at least thrice until down.

Notes:
a) You can buy those mid-joint or drumlets to make this dish depending on your preference.
b) If you can't get hold of rosemary you can ombit it but add in more garlic slices instead.

Saturday 10 May 2008

Our Pre-Mother's Day Dinner

Tomorrow is 11 May 2008 is once a year Mother's Day so my little Darling Reyon insists that we will have these for dinner today to celebrate Mother's Day. Early in the morning, he asked me to go market and buy some fresh prawns to make his favourite Deep-fry Breaded Prawns and some other ingredients to make the ABC Pork Ribs Soup.


ABC Pork Ribs Soup consists of carrot, potato, corn and pork ribs. Reyon loves this soup because of it's natural sweetness and fragrant taste. I purposely boiled extra amount of this soup and use it as a base to cook it with rice so that the white rice will taste even nicer.

Ingredient:
500g Pork Ribs
2 Medium Potato, cut into big chunks
1 Medium Carrot, cut into thick slices
1 Sweet Corn, cut into section
2 Garlic Cloves, lightly smashed
3 Shallots(small red onion), thinly sliced

Methods:
1. Wash and trim the pork ribs then blanch it in boiling water for about 5 minutes, removed and rinse with water then set aside.
2. Use a soup pot, add about 1/2 tablespoon of oil and saute the shallot and garlic for about 2 minutes then add in the carrot, potato and pork ribs and continue to saute till fragrant on low heat for about 5 minutes.
3. Add in about 1 litre of water and bring it to boil then add in the corns.
4. Let it simmer for about 25 - 30 minutes then season it with salt if prefer.(i add in 1/4 of the chicken stock cube)

Notes:
a) I replace the water for cooking rice with the above soup stock to make the rice more fragrant.

This is another one of Reyon's favourite deep-fry food other than chicken wing and nuggets. He loves either traditional Tempura Prawn or this type of Breaded Prawns. He can eat either 3 or 4 of this prawns for his usual meal.Posted by Picasa

Ingredients:
6 - 8 Medium Size Prawn, shell and devein
3 Tablespoons of Corn Flour
1 Beaten Egg
5 Tablespoons Dry Breadcrumbs(might need more)
Oil For Deep-frying

Methods:
1. Remove the shell from the prawns and keep the tail portion, try to snip two cuts at the base of the prawn so that the prawn will not curl up when deep-fry.
2. Next dry the prawns with kitchen paper towel well so that it will not have any water for safer frying.
3. Coat the prawn with cornflour then deep in beaten egg then coat with breadcrumbs and back to beaten egg then breadcrumbs again then set aside. (you can refer to a similar example here as in cornfour, beaten egg and breadcrumbs)
4. Make sure that the oil is hot before you drop in the coated prawns. Fry a few prawns at a time to avoid over crowded.
5. Fry the prawns till golden brown at medium heat for about 2 - 3 minutes.
6. Drained them well on kitchen paper towel and serve hot so that they will be crispy and nice.

Notes:
a) Select those with hard shell and firm meat type.
b) Remember to dry the prawn really well so that you can achieve a more crispy texture while deep-frying.

Lastly, I want to wish all my blog pals and reader especially those who are already mummy, I sincerely Wish You a HAPPY MOTHER's DAY............

Saturday 23 February 2008

Sushi Tale

It's had being a few months since my last Salad post in December. Due to the hectic working schedule, I don't really have time to whip up any meals on the weekdays night as well as weekends. What I do most is to spend time with my little darling and doing all the household chores. But this weekend, upon Reyon's request we decided to turn out kitchen into little Sushi Bar.........(click here to see our Little Sushi Chef)


These are what we had made for our dinner and all these are Reyon's favourite sushi like Kanikama, Tamago and Kani Salad. I also made a few Gunkan Sushi(round sushi which is wrapped with seaweed and topped with ingredients) topped with Fish Floss for him.

Ingredients For Sushi Rice:
125g Short Grain Rice
Seasonings
10g Fine Salt
35g Fine Sugar
50ml Japanese Rice Vinegar

Methods:
1. Mix salt, sugar and vinegar in the pot and simmer over heat till mixture is dissolved. Set aside.(or you can do it in Microwave oven on 30 sec High)
2. Using both hands, wash rice gently for a few times till rice water becomes perfectly clear then drain.
3. Add some water and soak the rice for 30 minutes. Drain and add 250ml water and cook in the rice cookers.
4. When the rice is cooked, let it stand in rice cookers with covered lid for 15 minutes before removing the lid.
5. Transfer cooked rice into a wooden rice tub, pour prepared seasoning mixture evenly over sushi rice and stir well with wooden ladle. Use a fan to cool the rice for 5 minutes.

Tamago is the Japanese omelette commonly used in maki, nigiri and tamaki sushi. Unlike a regular omelette, the tamago is made with sugar, soy sauce, and mirin added. And this is always the MUST have items when Reyon visit any Sushi restaurants, he can have about 4 in a meal. This is my very first time trying to make this at home for him. Even though I didn't managed to achieve those professional Tamago look but at least it still taste good and presentable...... For those who are interested to try out, here is the recipe that I used and also a very good youtube video that is recommended by one of my friend Pamy on how to fry the omelette @ Tamago Making (I did not use the recipe given in the video). Posted by Picasa

Ingredients:
2 Eggs
2 Tablespoons of Dashi Stock
1/2 Tablespoon Sugar
1/2 Teaspoon Mirin
1/4 Teaspoon Soy Sauce

Methods:
1. Add the eggs and the rest of the ingredients in a big bowl then beat well to make sure that it is smooth and well combined.
2. Heat up a well-oiled tamgo pan and pour about 1/4 of the mixture to the pan and swirl it as if you making crepe.
3. Cook the mixture over medium heat till almost done, fold it up to the side with a chopstick to the back of the pan.
4. Add more oil to the pan and pour in another 1/4 of the mixture, making sure to get some of it under the roll.
5. As it cook, roll the sheet and fold it up again and set it on top of the previous omelette.
6. Repeat the steps until all omelette mixture is used up.
7. Square omelette with a wooden block and remove, leave to cool.
8. Cut omelette into 7 or 8 slices then mould the sushi rice and place each slice of omelette on top and wrap it with a roasted seaweed strip and serve.


Notes:
a) I replace the Dashi Stock with Chicken Stock.
b) The 1/4 of the egg mixture that you pour in will depend on the size of the pan as in it might be more or less.
c) If you don't have the special rectage pan for making tamago, you can use any normal round pan but then trim the side when it is done. Or you can get a affordable rectangle pan at any Daiso branch for $2.

Tuesday 10 October 2006

Grill Asparagus With Bacon & Cheese

Hello! All my blogger friends out there! I am back in action again....... After disappearing for about a month plus. I finally decided to start off my blogging hobby again.

Very soon, you will see new recipes coming up... so just give me a few days to sort things out, ok.... Cya.....Thanks for those who kept coming back to check for new recipes and etc. Hope my new coming up recipes will enhance your cooking life in a way.... :) Posted by Picasa

Tuesday 22 August 2006

Yam Balls & Crispy Prawn Salad

Try making this dish from one of the cookbook which is called the "Flaky Taro and Scallop Ring" but in the end I change the entire dish and end up something like this. Because instead of using scallop I replace it with prawn and I also deep-fried the remaining prawn with coated breadcrumbs and serve with some fruit salad.

The original recipe for this yam balls are supposed to be very flaky type but mine was not. I am also not sure which steps had I miss out or do wrongly, but overall these yam balls do taste good as well.


Ingredients: (make 5 portions)
150g Yam, peeled and cut into cubes
40g Vegetable Shortening
5 Teaspoons(25ml) Boiling Water
2 Tablespoons Wheat Starch Flour
1/4 Teaspoon Salt,
1/4 Teaspoon Sugar
1/4 Teaspoon Five Spice Powder
5 Medium Prawn, shelled & devein

Methods:
1. Steam yam for about 15 - 20 minutes until tender, use a fork to mash up the yam then set aside.
2. Put the flour and boiling water in a small bowl and stir till combined.
3. Add the flour paste into the yam paste together with shortening, salt, sugar and five spice powder.
4. Knead into a smooth paste then divide the paste into 5 portion, wrap 1 prawn each and shape into round balls.
5. Heat oil and deep-fry until yam balls are crisp and golden brown, drain well.

Fruit Salad Ingredients:
1 Avocado, diced
1 Tomato, deseeds and diced
1 Apple, peeled, cored and dice
1 Tablespoon Salad Dressing

Methods:
1. Mix all the above ingredients together and stir till combined then served.

Breadcrumbs Prawns Ingredients:
6 - 8 Prawns, shelled & devein
3 Tablespoons Dried Breadcrumbs
1 Tablespoon Cornstarch
Some Beaten Egg

Methods:
1. Coat the prawn with some cornstarch then dip in beaten egg and coat with breadcrumb.
2. Deep-fry it in medium hot oil until crisp and golden brown, drain and serve. Posted by Picasa

Monday 26 June 2006

Bacon, Mushroom & Cheese Tart

Make this Bacon, Mushroom and Cheese Tarts for my guest yesterday night dinner and everyone love it very much. The taste of the filling is just right and the case is very crisp and yummy. Thank Tazz for sharing this wonderful recipe.... Another test proof recipe from Tazz's kitchen.....

For my version, I actually pan-fry the chopped bacon in some olive oil for a while till fragrant then I spread it evenly onto the tart case itself. As I thought this might make the bacon more fragrant when bake..... Posted by Picasa

ShareThis