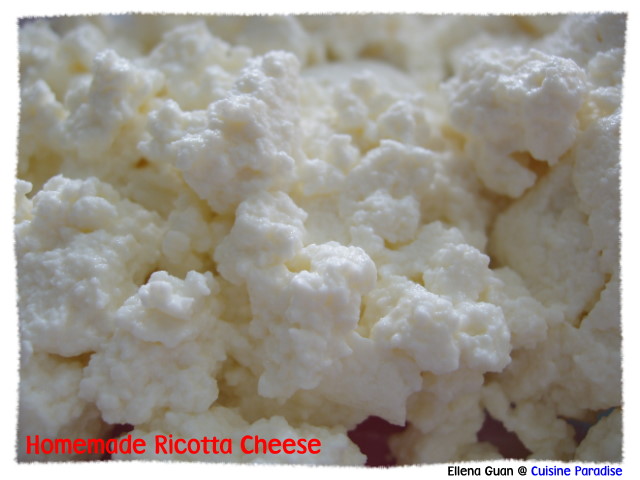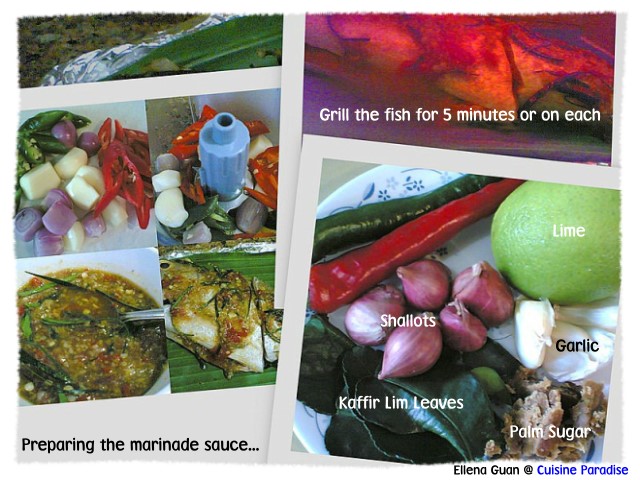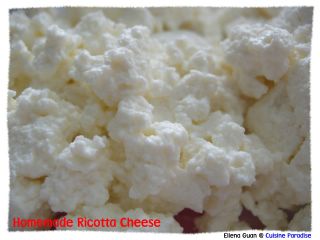
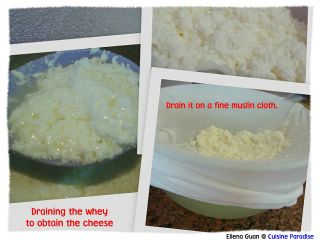
Can you "
Guess What Is This Cloud Like" thing in the picture? I bet you can't right, you might think that is the cooked egg white or some over whipped cream. Actually this is my 1st
Homemade Ricotta Cheese which is introduce by Tracy base of her research on some blog sites.
Ricotta is an Italian cheese made from the whey which results when making cheeses such as mozzarella or provolone. The name "
ricotta" means "
cooked again" in Italian, referring to the second processing of the liquid to produce the cheese. Ricotta is similar in texture to cottage cheese though considerably lighter and is a
key ingredient in cheesecake, lasagna and many cannolis. It is often served mixed with sugar, cinnamon and occasionally chocolate shavings as a dessert in Italian household
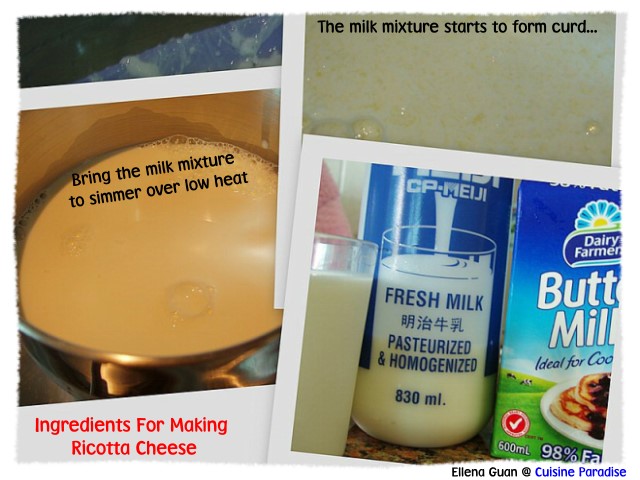
 For those who is interested in trying out, you might take some reference from these blogs Lex Culinaria blog, Fias Co Farm, Ricotta Making. For my case, after some simple conversion and calculation, I starts trying on using small amount of milk and I made two different batches of ricotta cheese by using buttermilk and lemon juice separately. The finally result from using lemon juice is much finer and smooth compare to the buttermilk.
Ingredients: (make about 125g ricotta cheese)
120ml Buttermilk/55ml Fresh Lemon Juice
480ml Fresh Whole Milk
Methods:
1. In a small milk saucepan, simmer the fresh whole milk over low heat until around 90 - 95 degree.(you need to have a themometer that reads up to 100 degrees or more, if not you have to estimate the timing when you saw a lot of steam rising and it's almost going to boil)
2. Slowly add in the buttermilk or lemon juice and give it a gentle stir.(do not over stir it or you will break up the large ricotta pieces)
3. You will see very tiny white particles floating in the whey.
4. Remove the pot from the heat and set it aside, covered to rest undisturbed for about 15 minutes.
5. Line a big container or mixing bowl with muslin/cheese cloth.
6. Slowly pour the whole whey mixture into the prepared bowl and drained until the no liquid left on the cloth.(the more milk you used, the longer it will take to drain)
7. When it has drained, place the ricotta in a clean contain and you can keep it in the fridge for up to one week.
Notes:
You can season the ricotta with either salt or salt depending what you wanted to used it as.
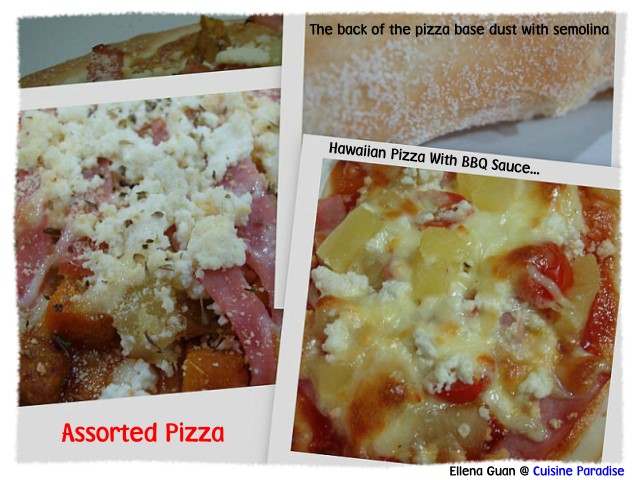
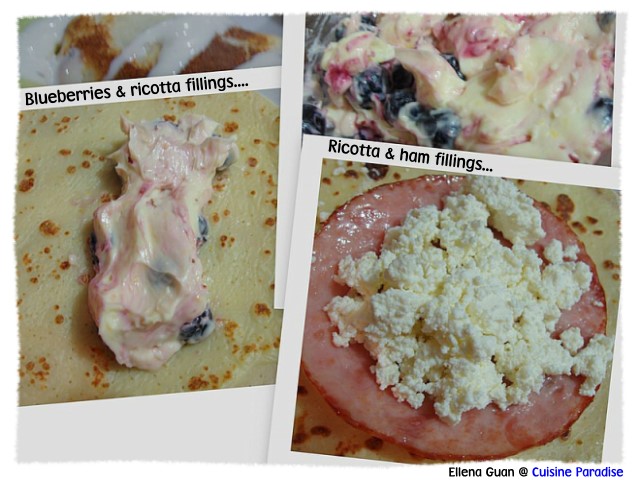
You can use it for pizza filling, crepes or making ricotta cheese cake or muffin. 


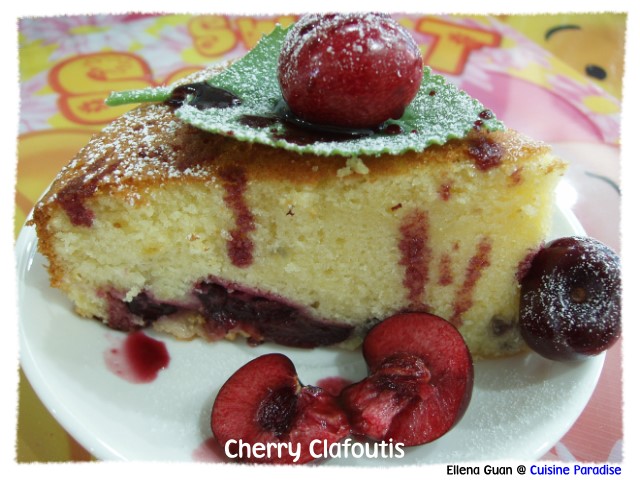 Saw this very interesting cherries recipe from Obachan's Kitchen. Since cherries are in season now, I decided to get some and try out this recipe. In the original recipe, they called for 1kg of cherries, but I only used about 500g and I already think that it's a lot.
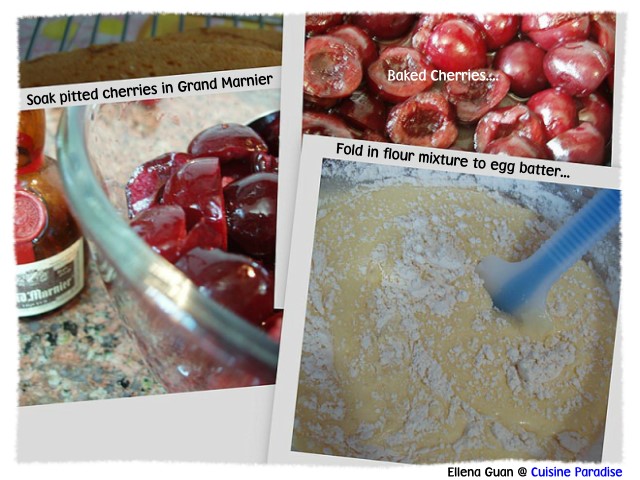 As like what she had mention, she soaked her pitted cherries in Sherry. But for my case, I soaked them in Grand Mariner(orange liqueur) to make enhance the cherries favour in a better way.
 Overall, this cake is very moist and soft. It had a slightly light almond scent fragrant because of the added almond essence. But for those who is not an almond fan, then I think you should omit it or else you won't like the scent of the cake.
 In the recipe itself, it said used 1 cup of milk for the flour batter, but I only used about 1/2 cup because I found that my flour batter is already quite watery. So if you do want to try out this recipe, please add in the milk slowly and stir until an pouring cake batter consistency.